TRAVEL

HAVASUPAI (& THE GRAND CANYON CONFLUENCE)

IMG_4903.JPG


WHAT?

One the most beautiful places on earth.


HOW DO I GET HERE?

First things first. You’ll need a reservation. Here’s what to do.

  1. Remember this date: FEBRUARY 1ST. This is when you can begin making reservations.

  2. Remember this website: http://theofficialhavasupaitribe.com. This is where you can sign up for reservations. Spots fill up FAST! Make sure you sign up immediately after reservations open.

While this blog will provide a brief overview for your trip, the website above will provide more in-depth details about how much permits cost, how many days you can stay, and further rules and regulations for staying in Havasupai.

HOW DO I GET HERE (PART 2)?

You’ve got your permit! Great! Here’s how to get here.

By car: Take the 1-40 to Seligman, AZ (I strongly recommend eating at https://www.westsidelilos.com/ before and/or after your experience in Havasupai). From Seligman take Indian Route 18 to the Hualapi Hilltop. Here you can park your vehicle and prepare for the next leg of your trip.

To get to Havasupai Village you’re most likely taking one of two ways:

  • Hiking in: Prepare yourself for an 8 mile downhill hike to Havasupai village where you will check in and receive confirmation of your online permit. It’s another 2 miles from here to the campground but if you’re staying at the Lodge then you’re already there. You can always pay a small fee for your backpack to be carried up and/or down the trail by mule.

  • Helicopter ride: 85$ one way. A short 10 minute ride from the Hualapi Hilltop to Havasupai Village. Please visit this website for more details: https://waterfallsofthegrandcanyon.com/havasu-falls/havasupai-helicopters/

WHERE DO I STAY?

Most people stay at the campground, 10 miles from the trailhead. Several eco-friendly bathrooms and a fresh water spring are available at the campground.

Lodging is also available at the Havasupai Lodge. Reservations begin in the summer months.


WHEN SHOULD I GO?

Havaupai is open from February to the end of November. Summer months (May-August) are the best time to get in the water BUT they are also the most dangerous for hiking with temperatures rising past 100 degrees fahrenheit. These months also include monsoon season, and heavy rains can bring very dangerous flash floods to the area. Please be mindful of weather patterns and plan accordingly. Many people suffer heat related injuries (even up to death) every year while in Havasupai and in the Grand Canyon wilderness.

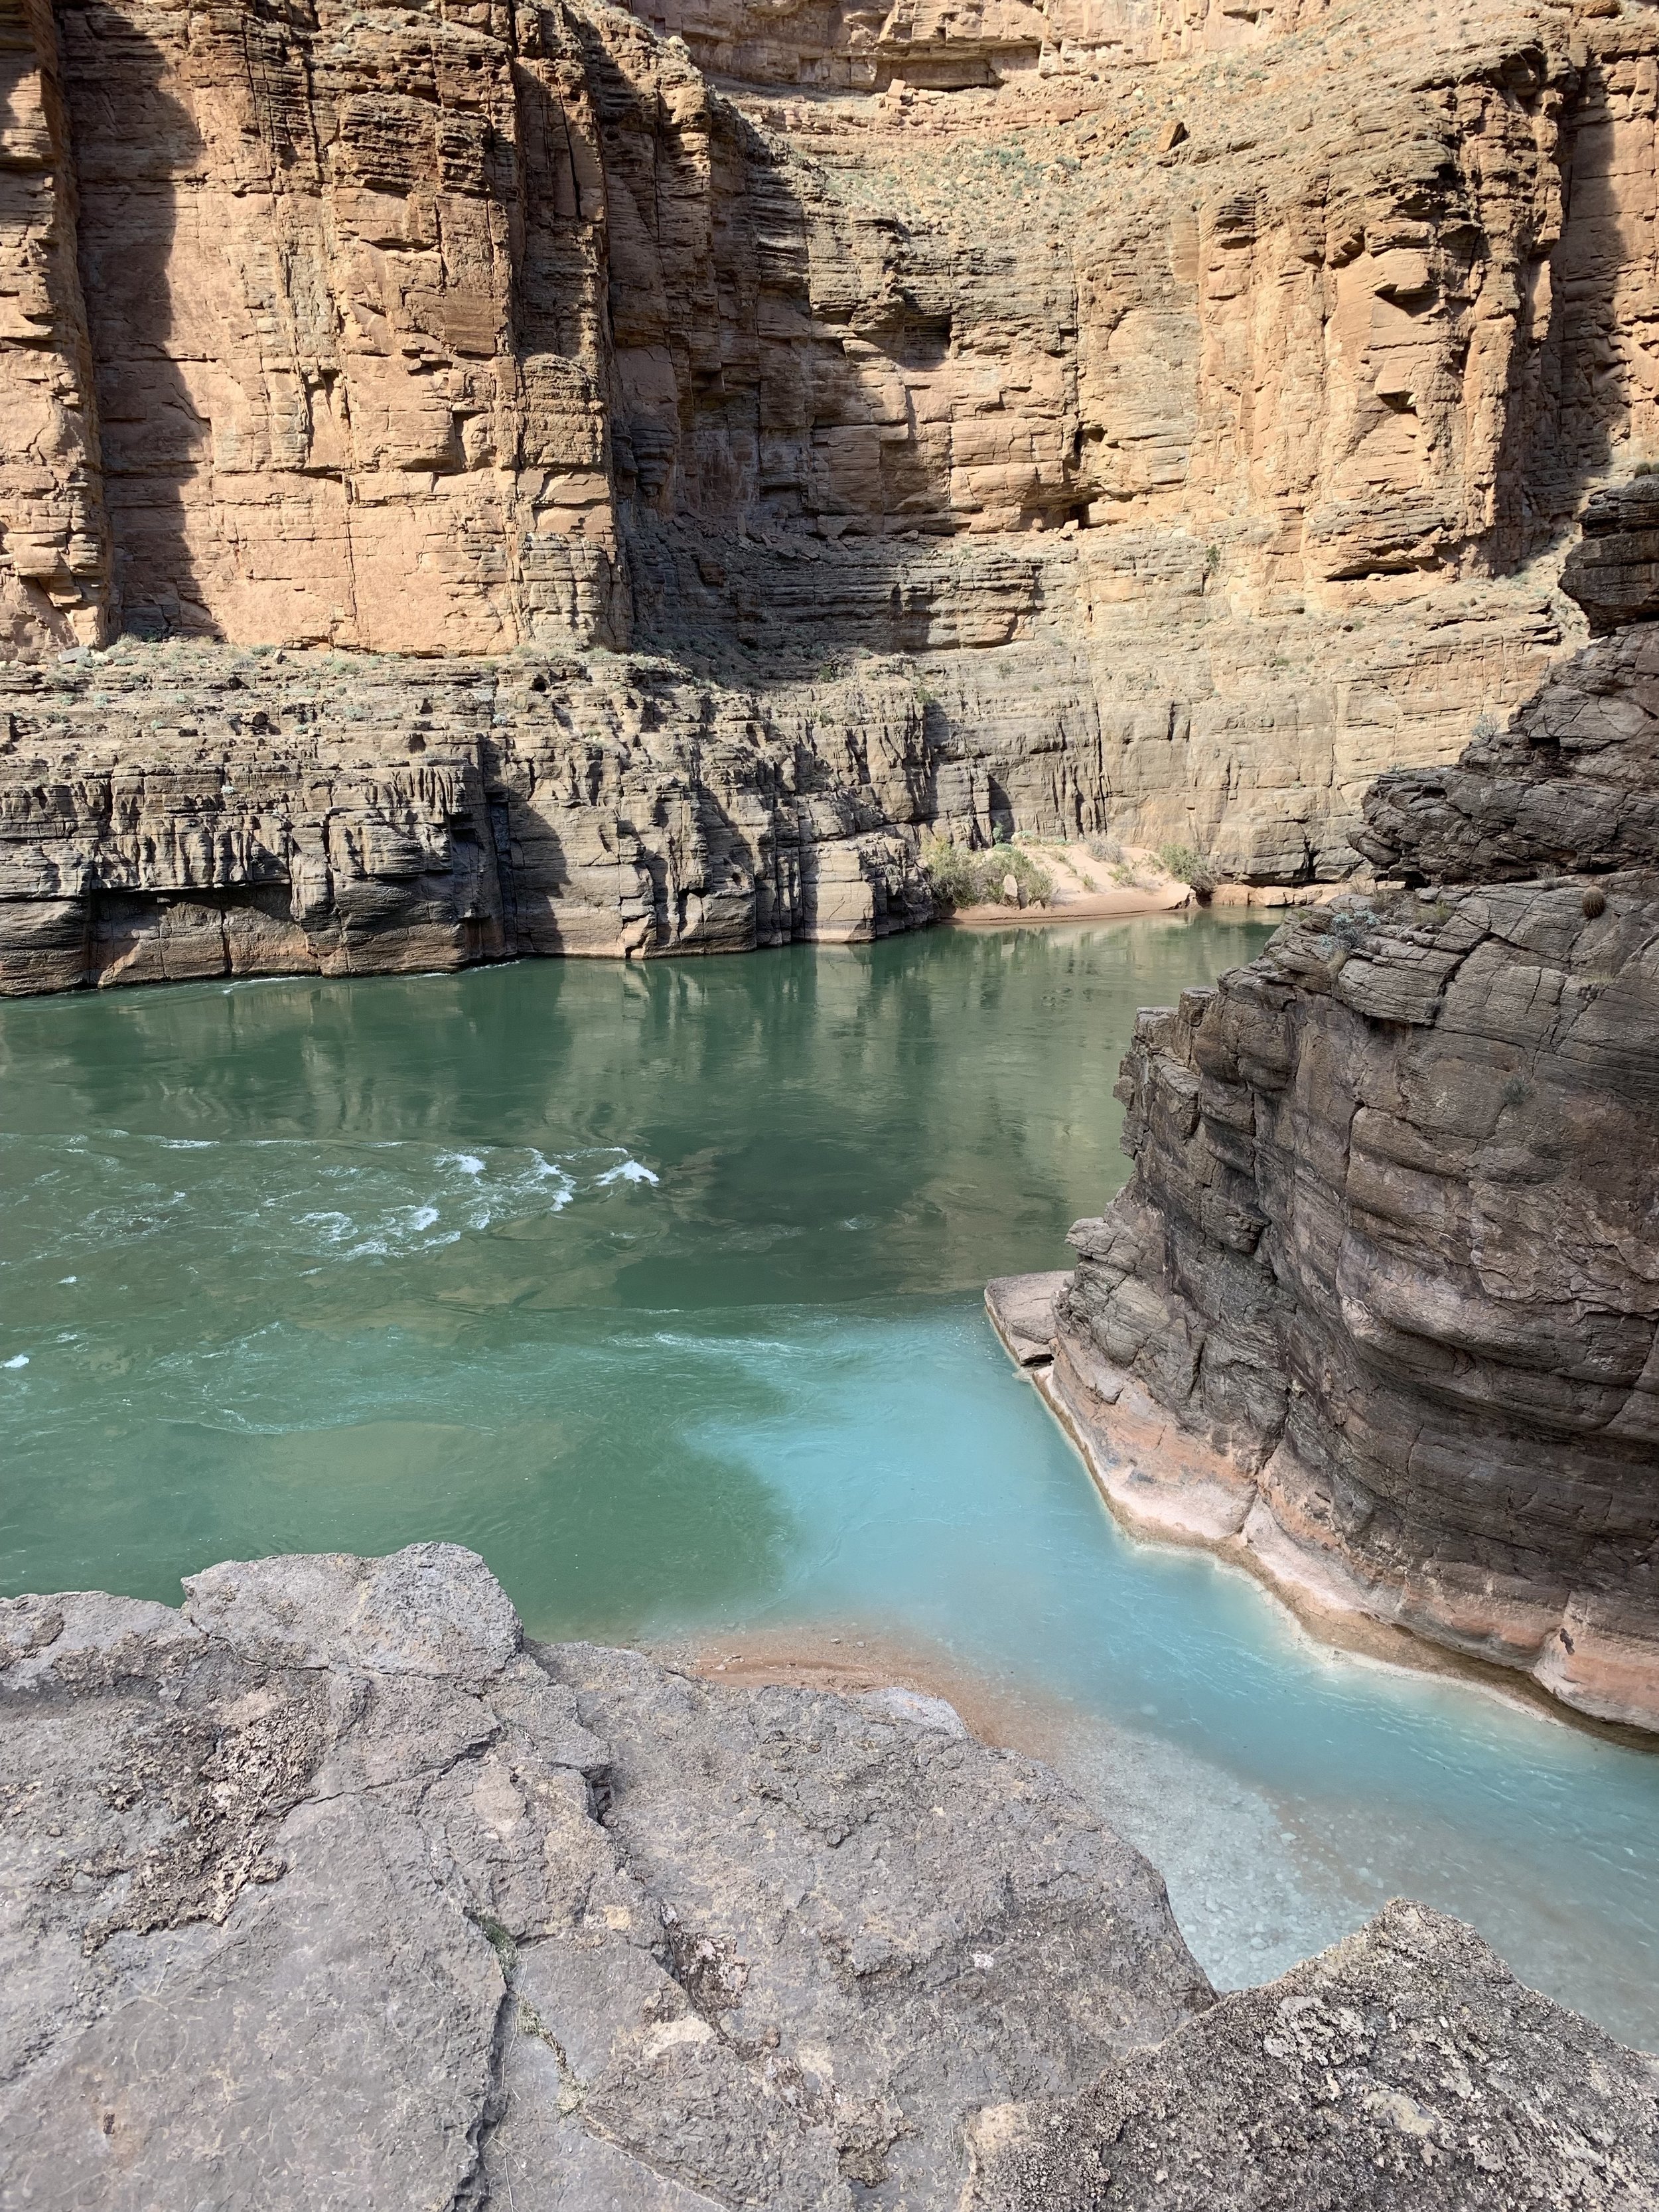
THE CONFLUENCE (HAVASU CREEK MEETS THE COLORADO RIVER):

For those of you here for details regarding the hike to the confluence: Bring plenty of water for the day (3 liters has typically been enough for me). Pack a lunch, bring snacks, and plan on having dinner back at the campground. I strongly suggest beginning your day from the campground no later than 8AM as you will be in for 14-18 miles (or 7-10 hours) round trip of hiking. The mileage varies depending on where you stay in Havasu Campground and also because you will be crossing the Havasu Creek 9-10 times. Route finding can be tricky and rock cairns will serve as your best friend. You will get wet on this hike, although the water crossings have never been higher than my thighs. I suggest wearing a pair of shoes that you don’t mind getting wet and that you don’t have to take off each time you cross the water. This will help cut down on time and energy.

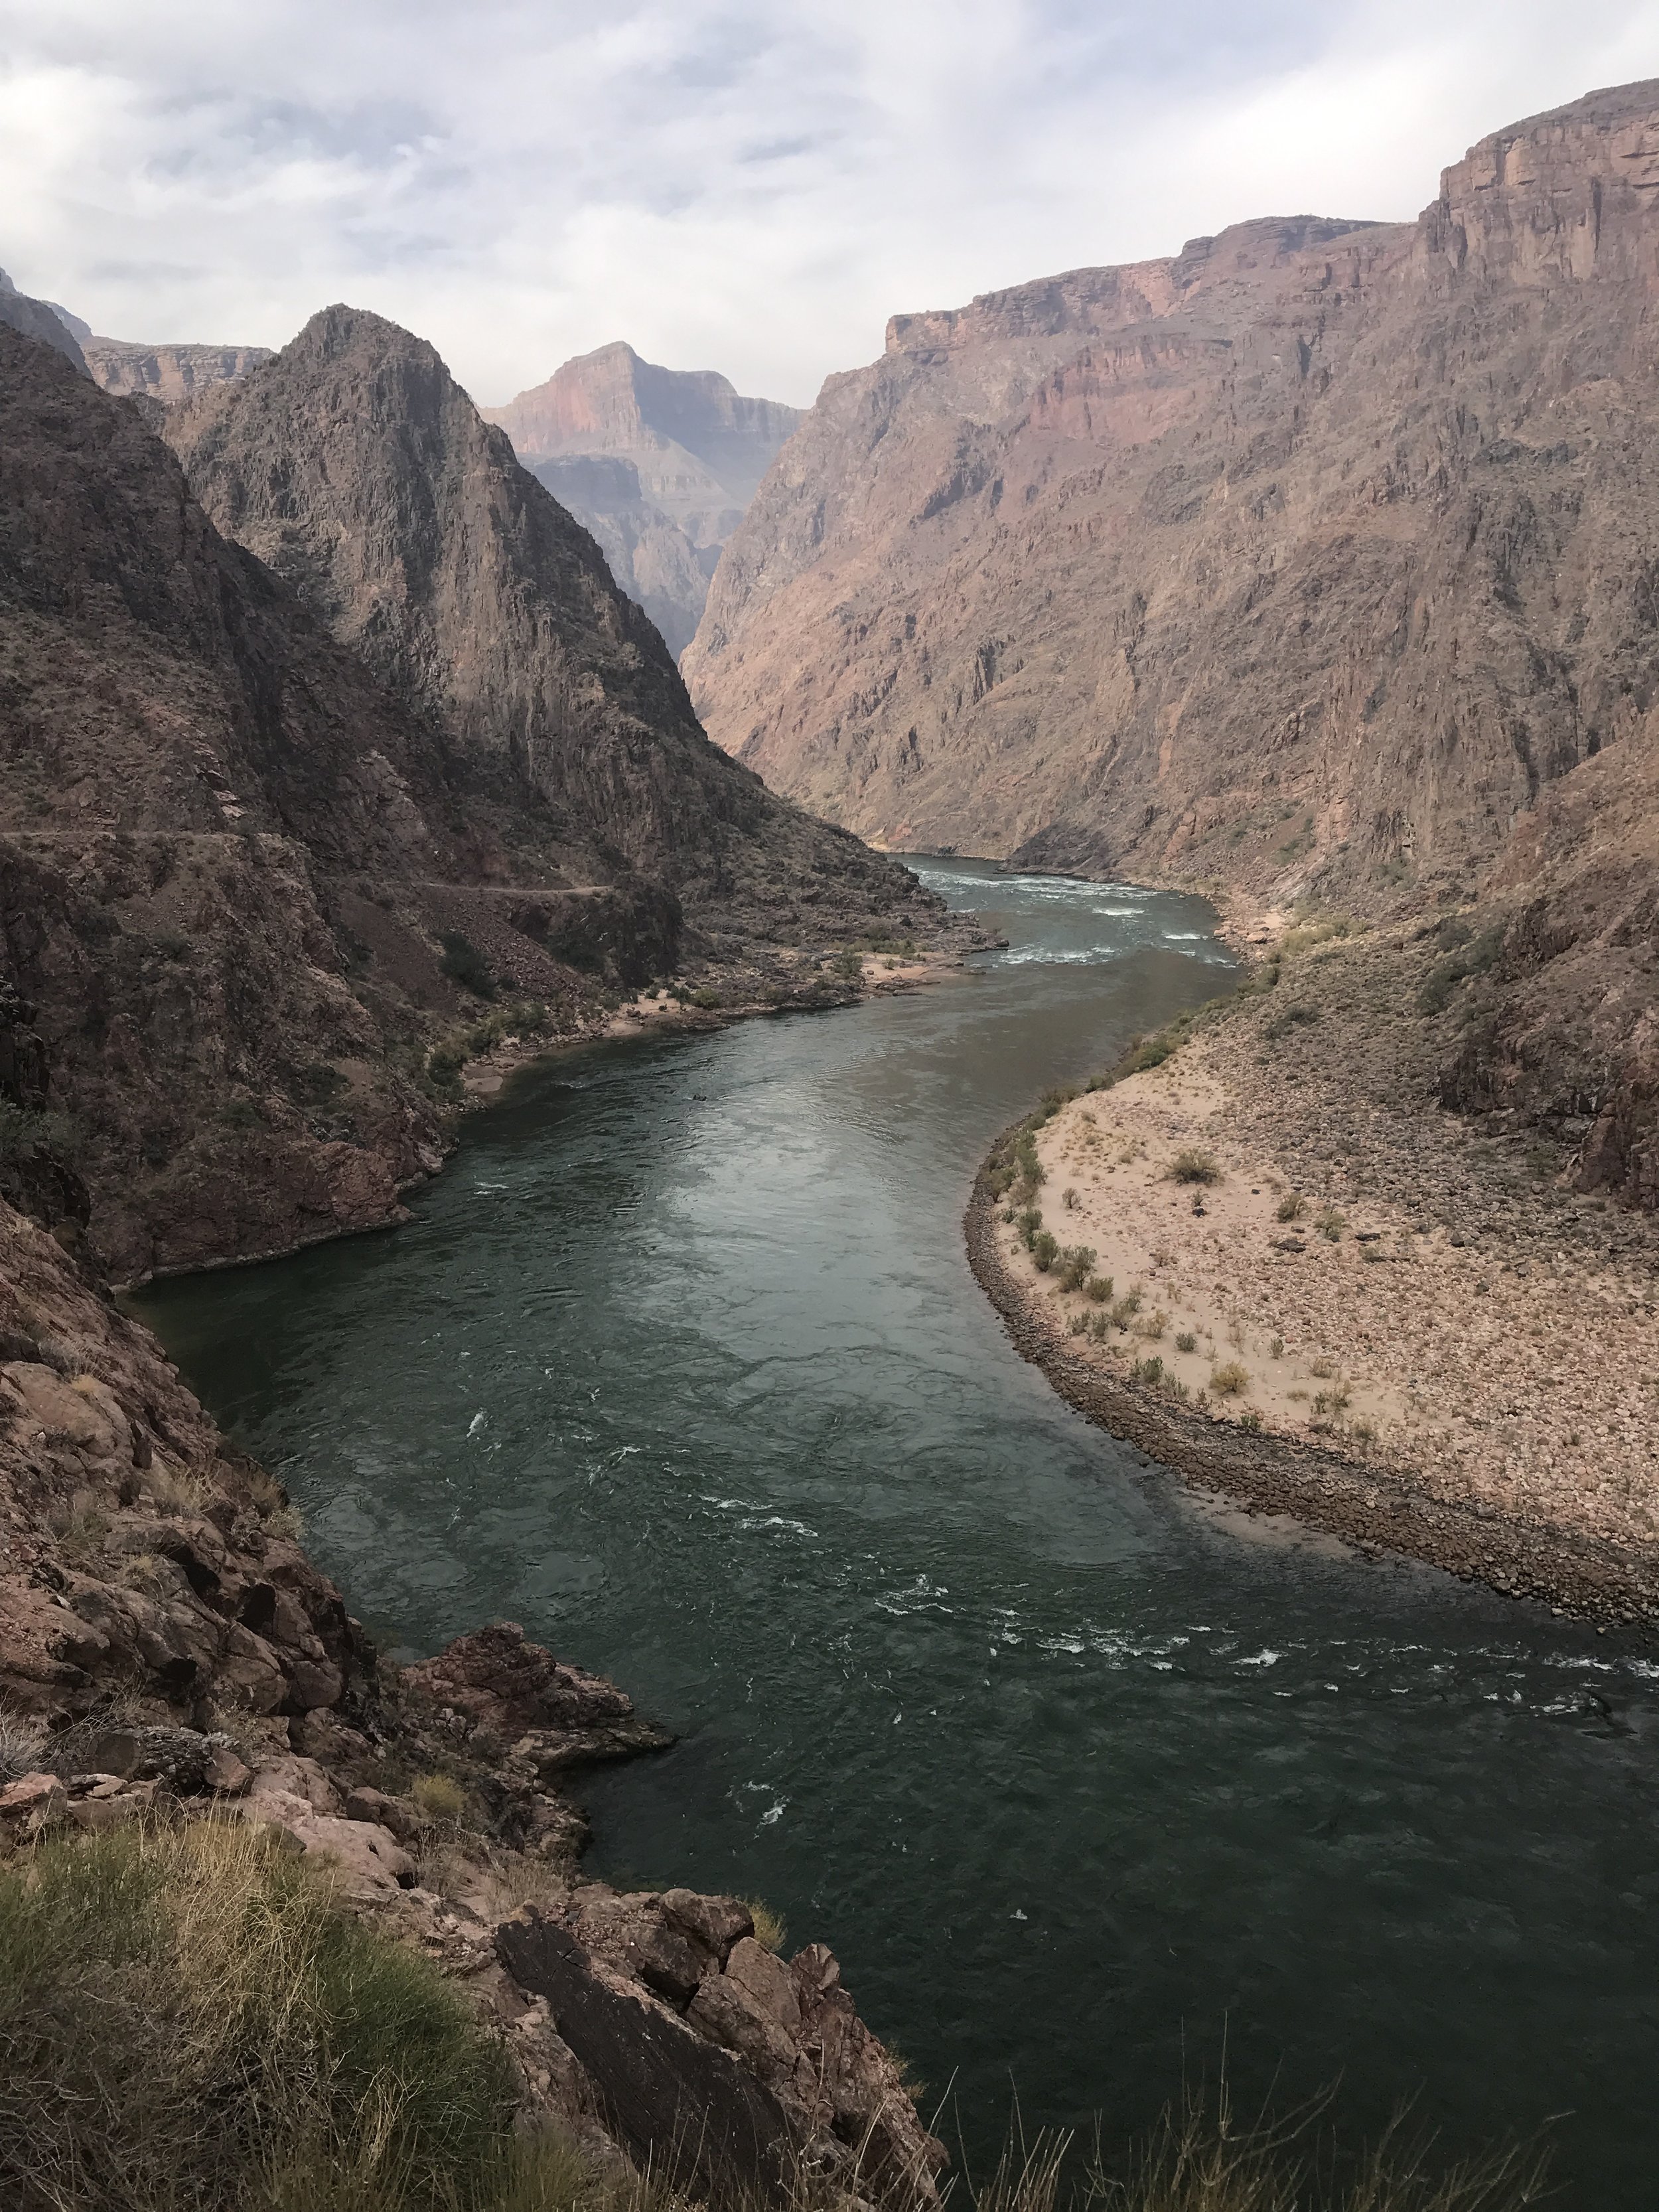
People that do this hike will usually include a small visit to Beaver Falls which is along the way. By this time you will have crossed the Havasu Creek 3 times. The Beaver Falls area is also the area you will be leaving the Havasupai Reservation and entering Grand Canyon National Park. Along the trail, just before Beaver Falls, there is an option to turn left and go to the falls or to continue straight over a large hill and into the Grand Canyon. As you choose to continue straight you will reach a sign that designates you are leaving Havasupai Reservation. Make your way down the large hill and you will meet up again with Havasu Creek. From here you’ll have another 4-6 miles to the confluence, and you’ll cross the creek another 6 or so times. The trail is beautiful but can also be hard to find at times. Be on the lookout for cairns to help guide the way. You may even encounter Bighorn Sheep if you’re lucky.

The confluence is a popular place for river rafters to dock their rafts and do day hikes up Havasu Creek. When you arrive you will see the beautiful blue waters of Havasu Creek meet the roaring grey waters of the Colorado River. It’s quite a sight to see. Congratulations! You are now a part of a small group of people that have made it this deep into the canyon.


WHAT WILL I SEE? (SPOILER ALERT)

In order of appearance:
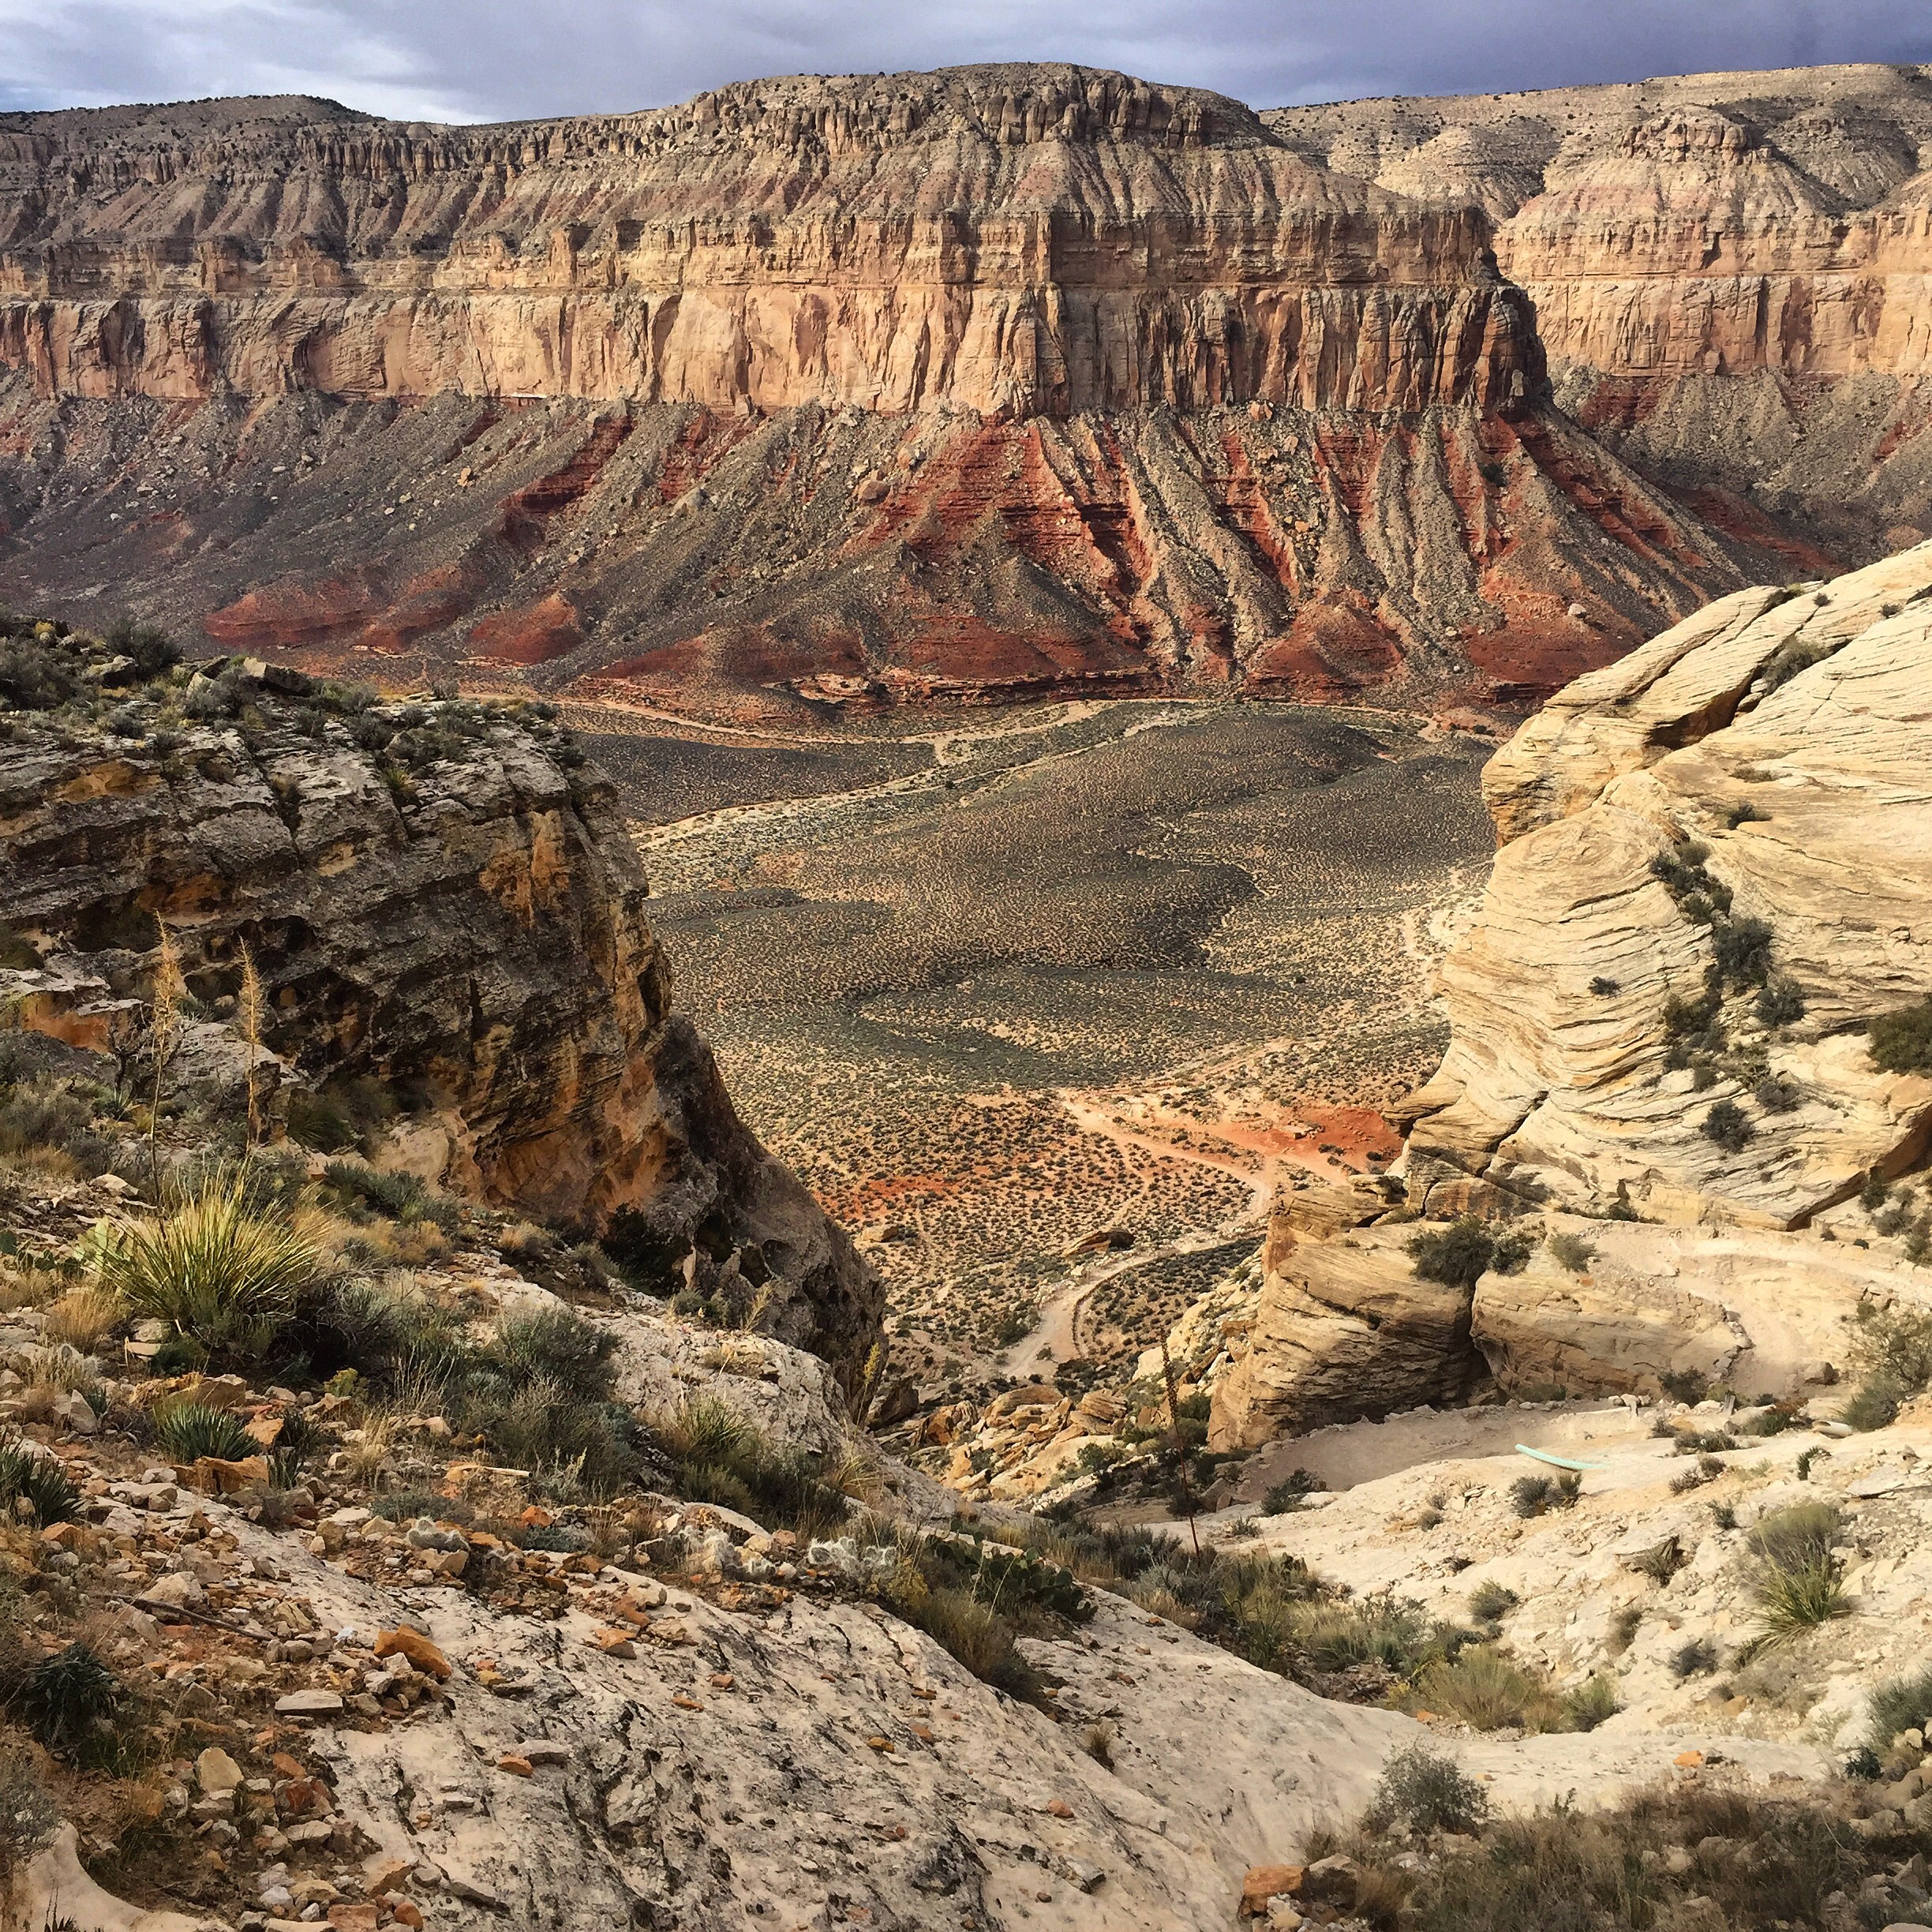
TRAILHEAD (START)

IMG_9124.JPG


HAVSUPAI VILLAGE (8 MILES IN)

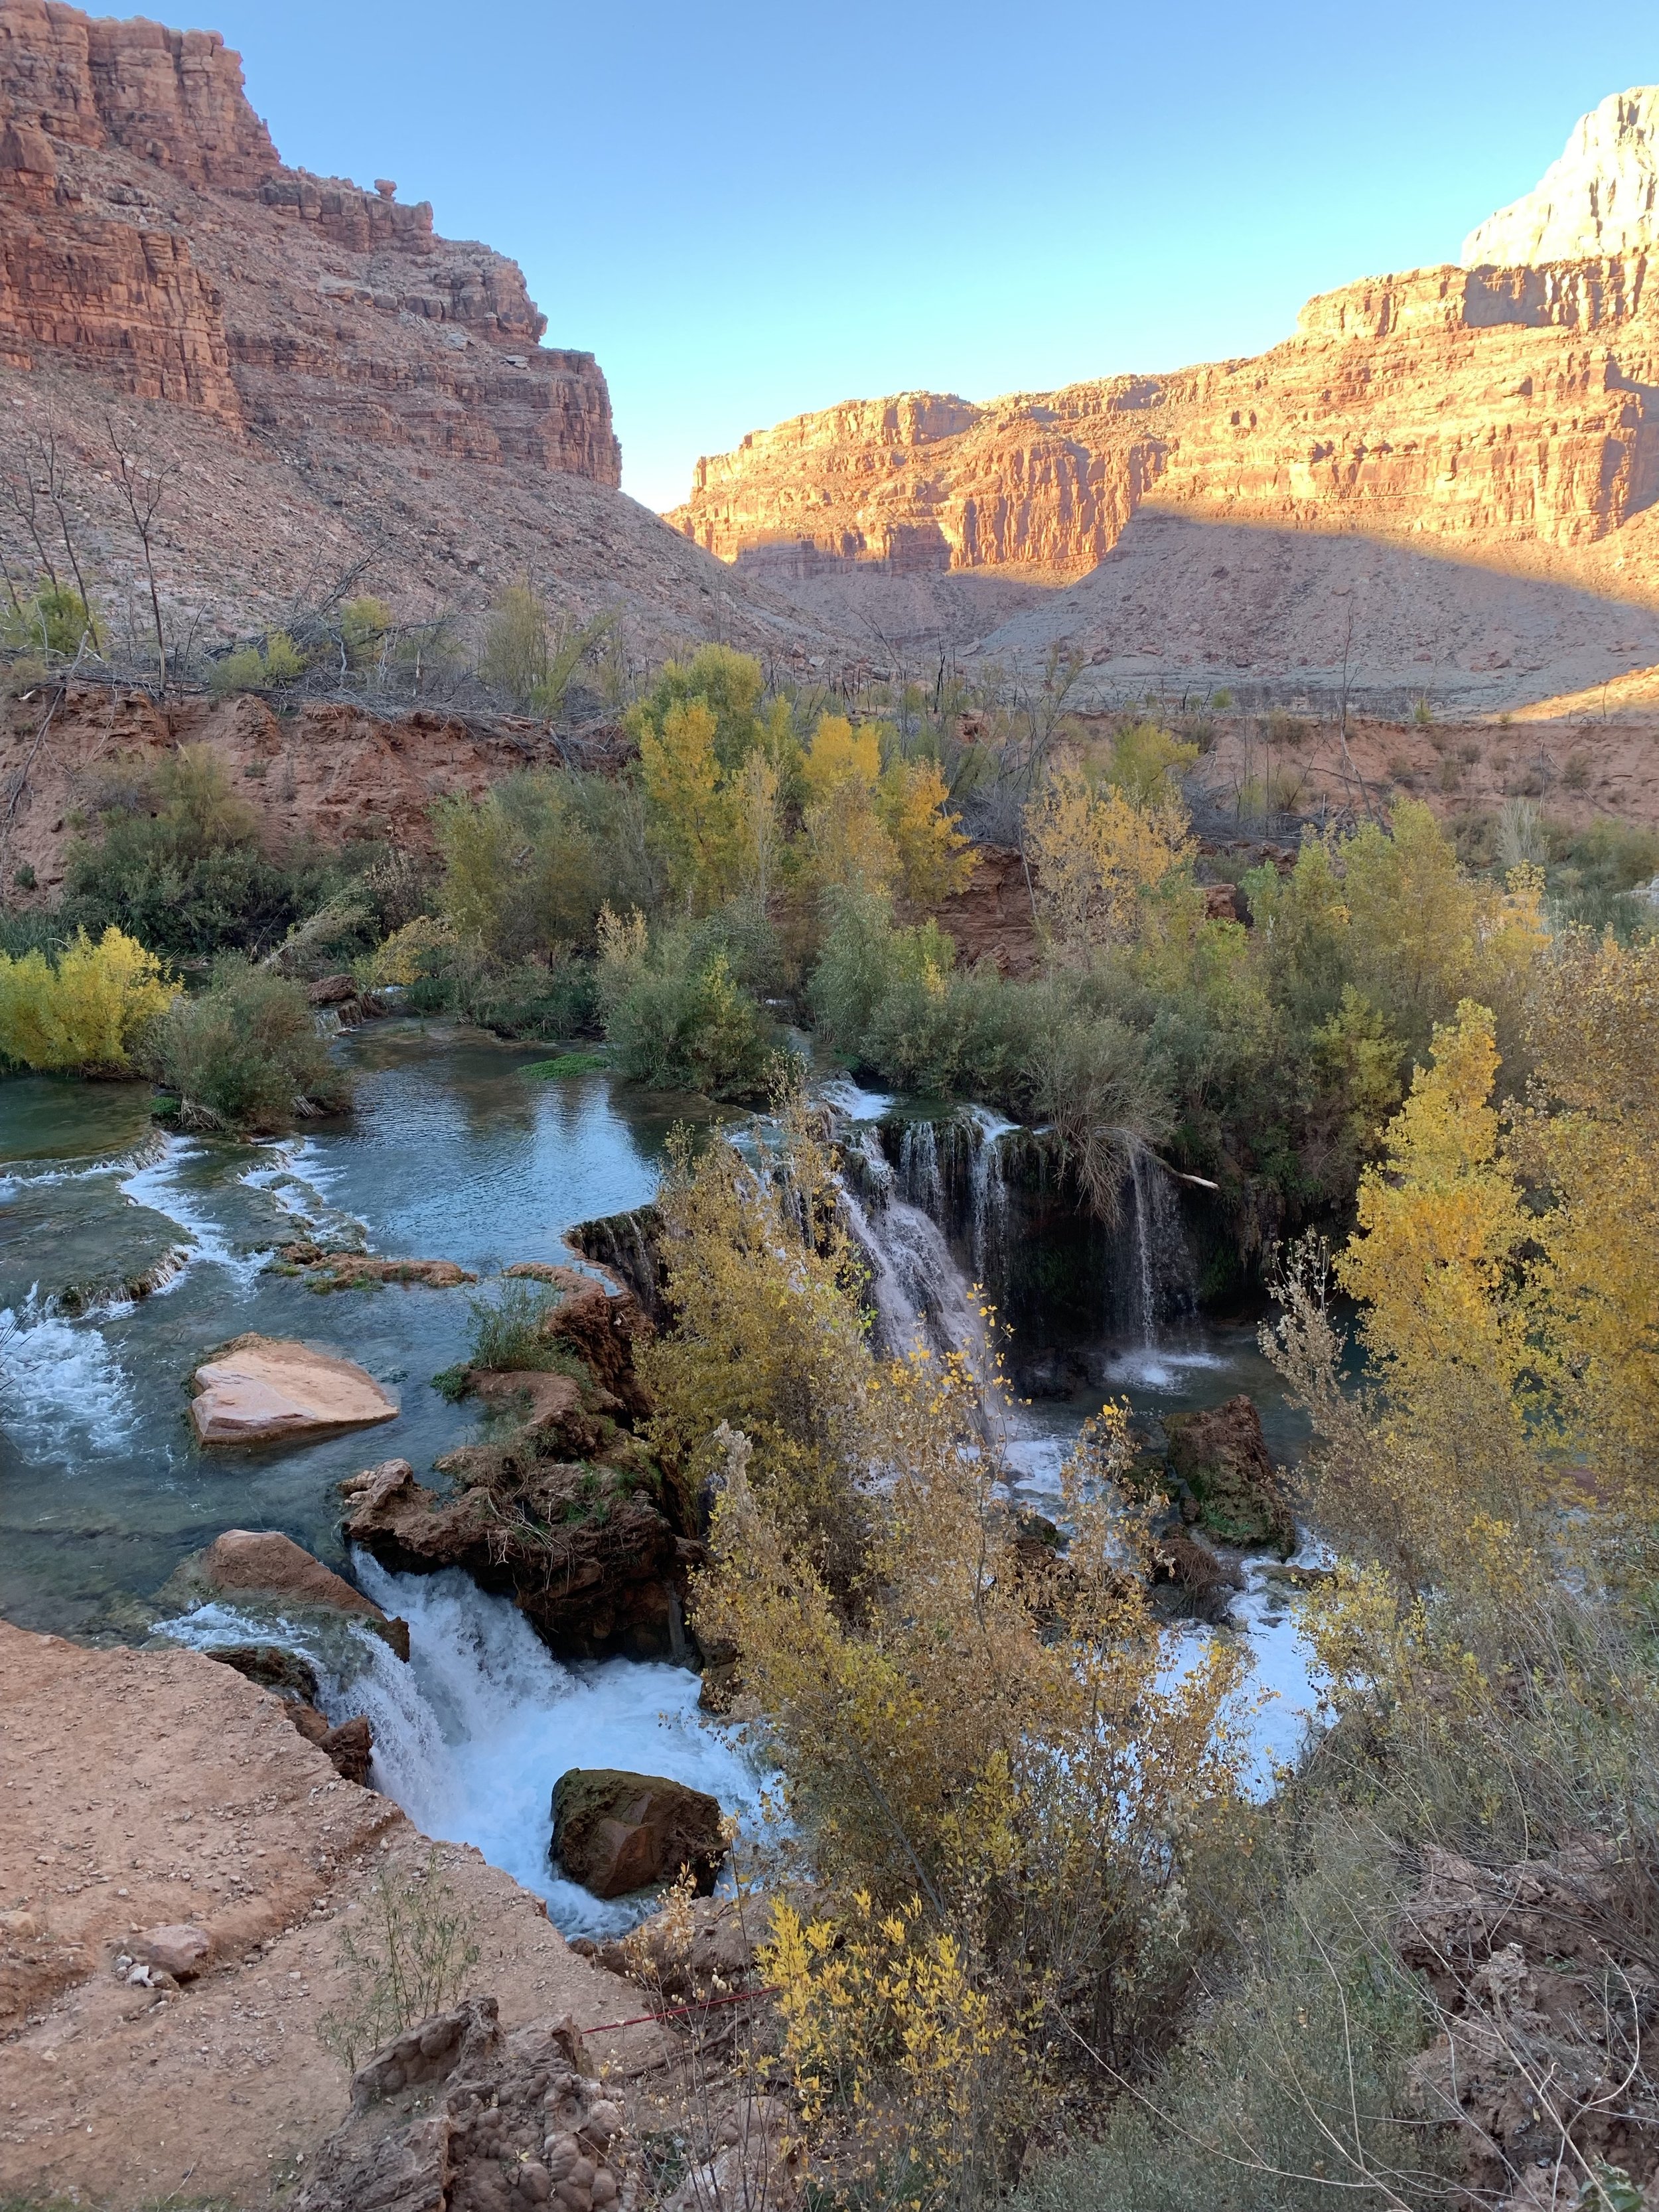
NAVAJO FALLS (9 MILES IN)

GgwXVyXSTz6eW55RKRf22Q.jpg


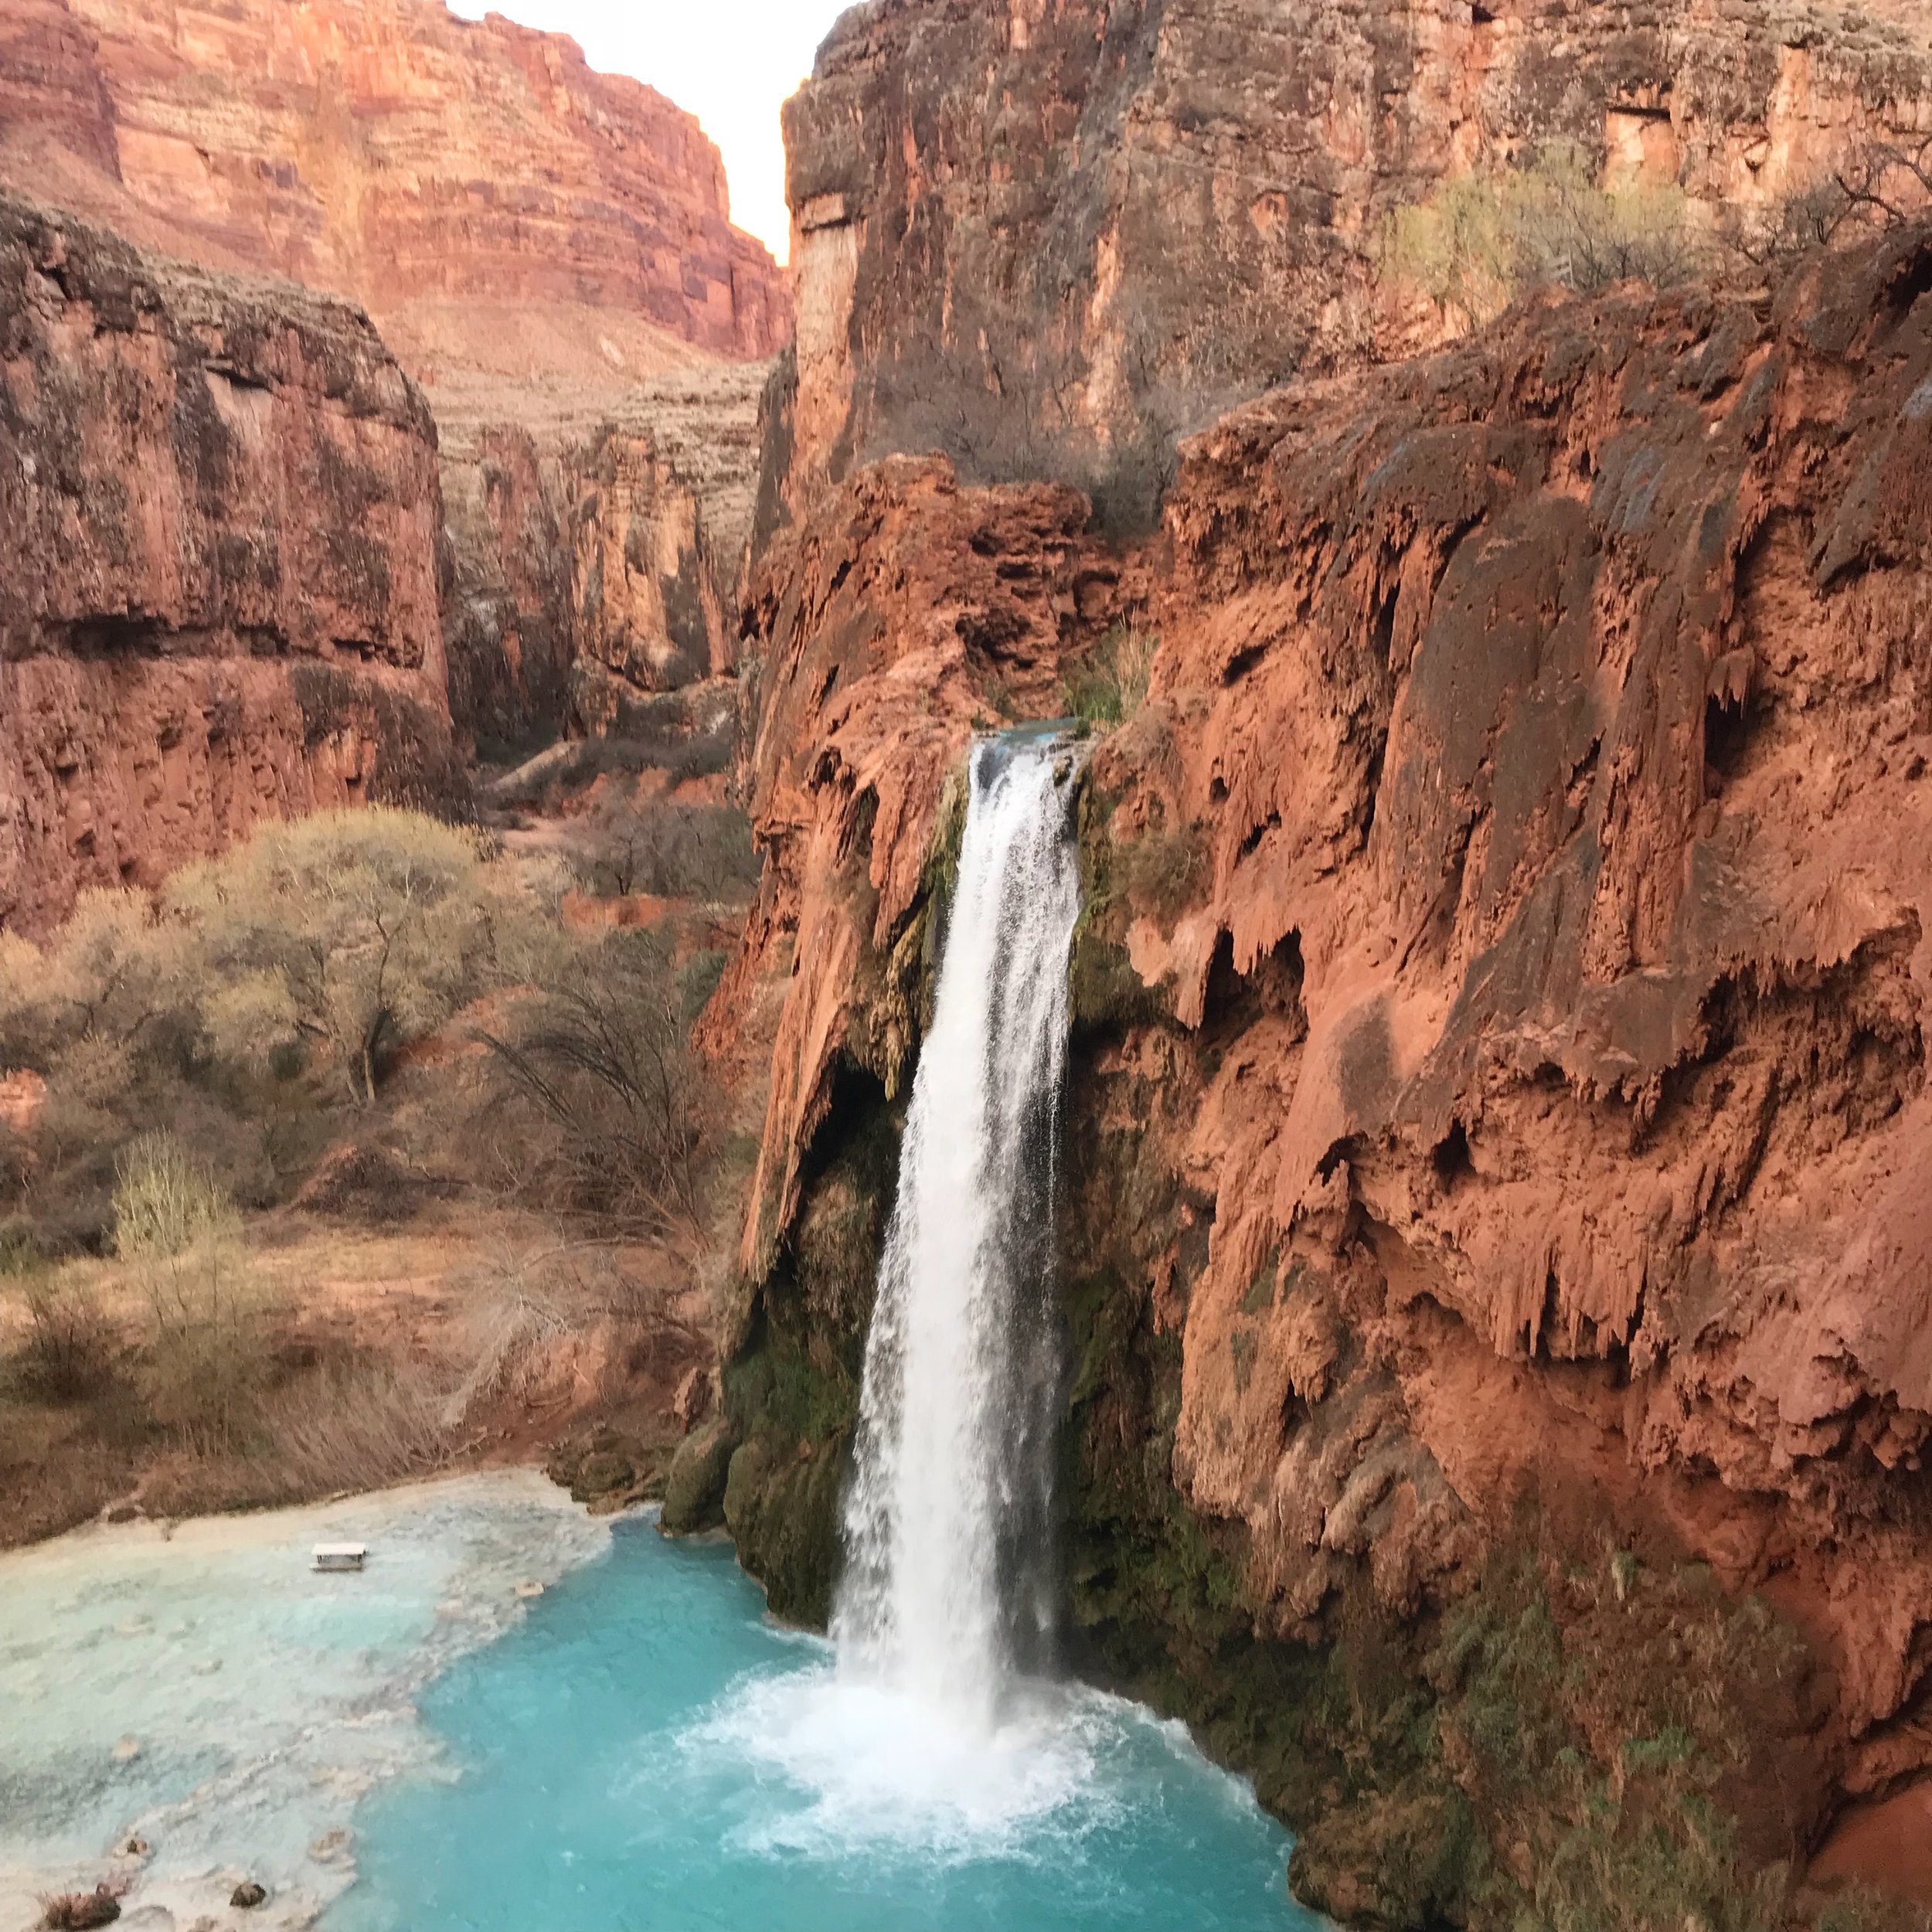
HAVASU FALLS (10 MILES IN)

cIt8OsPuThW09LcdZBi+pA.jpg

HAVASU CAMPGROUND (10 MILES IN)

x9zGHccTTEOiRBMbffGXFA.jpg

MOONEY FALLS (10-11 MILES IN)

3oMuYRDKQemmfSfJNWJf0Q.jpg


BEAVER FALLS (12 MILES IN)

IMG_3303.JPG

ADDITIONAL HIKE TO THE GRAND CANYON CONFLUENCE (18-20 MILES IN)

vSqcsuHmRaS8Q+P5yK4NsQ.jpg


RAINBOW BRIDGE

IMG_6828.JPG

WHAT IS IT?

Rainbow Bridge is the world’s highest natural bridge spanning 234 ft. and with a height of 290ft. The bridge is made of sandstone and is a primary example of stream erosion in the Colorado Plateau area. Rainbow Bridge and the surrounding area is considered sacred to the local Native American tribes and is protected by the National Park Service.

WHERE IS IT?

Rainbow Bridge is located in the remote parts of the greater Lake Powell area, just northwest of Navajo Mountain in Southern Utah.

HOW CAN I GET THERE?

  • By Boat:

    Boaters can access this remote location via Lake Powell. A floating dock, the falls and rises with the water levels, is available for boats. From the dock, Rainbow Bridge is a short and easy quarter-mile hike away. Bathrooms are available at the dock. No camping is allowed.

  • By Hike:

    A very long and strenuous 32 mile round-trip hike starts from the northeast side of Navajo Mountain. Camping is available in select areas but not in the designated Rainbow Bridge area. The hike itself is extremely hilly but provides spectacular views of the Lake Powell backcountry. Give yourself at least 2-4 days to hike in and out.

    • How to Get There:

      The trailhead is accessed from Highway 160. Take the 98 North to Indian Route 16. From there go north to Road 434, and then north on Road 487. Road 487 is a 4 mile dirt road. High clearance is strongly recommended. When using Google Maps, “Navajo Mountain High School” will be the nearest location to the trailhead.

    • Safety:

      Please take note that for those attempting the hike to Rainbow Bridge that this is a hike suited for experienced hikers. There are a few spots along the trail for water, but it is scarce. Bring 1-2 gallons of water to start your hike and bring a water filtration device (you will need it). The trail itself is marked by cairns and at times they can be difficult to find…one small deviation from the trail can be deadly. If you do get lost make sure to follow your steps back to the last cairn and begin again. It is strongly recommended to do this hike in a group with experienced hikers. If you do decide to go solo, bring a map or GPS system, and notify someone that you are hiking.

Hiking through the backcountry en route to Rainbow Bridge

Hiking through the backcountry en route to Rainbow Bridge

QqfMa35%SY+GpKpYtlhwvw.jpg
TufbejZ4RW2bRvUvIT3XUQ.jpg

ICELAND: RING ROAD OVERVIEW

Stokness, one of the many wonders you'll expereince as your travel Iceland's ring road

Stokness, one of the many wonders you'll expereince as your travel Iceland's ring road

LET'S JUMP RIGHT IN:

So you're tired of seeing all those Iceland pictures on Instagram and have finally decided to make the trip to see for yourself! Now you're just looking for how to plan. Perfect! Here is a quick and simple one week itinerary of how to get the most out of your journey. 


THE RING ROAD: 

The ring road is approximately 800 miles (1300 kilometers) that traces the perimeter of Iceland. If you have 7-10 days, it's arguably the best way to experience this beautiful country. The road is two lanes, mainly paved, unless you are taking some shortcuts (which may be dirt or gravel roads), and is in fairly good shape (minus a few potholes). 


STEP #1: GET A RENTAL CAR

Yup. It's super easy. A one week rental from any of the major car rental agencies runs around $300 for the week, depending on how much insurance you're willing to get on it. Looking to camp in a van? There are plenty of options for that too! It is a bit more expensive... unless, of course, you're splitting the cost amongst friends.


STEP #2: HOUSING

There are lots of ways to experience Iceland. The two most reasonable ways to travel the ring road, given the weather, are either car-camping or airbnb-ing. As for my trip, I found reasonably priced airbnb's (around $100/night) in each of the places listed below.


STEP #3: PLACES TO STAY

Okay, now we're getting into it. Let's say you have one week to travel (it'll take at least one week to do the full ring). Here are some great cities/towns to stay in or explore. Together they give a great feel for the Iceland experience. Posted below is a map for your reference to the ring road:

Ring Road

Ring Road


A: KEFLAVIK AIRPORT TO REYKJAVIK

You've just landed at Keflavik airport. If you get in early in the day, you can make a morning or afternoon at the Blue Lagoon. It's a little pricey (around $60-70), but it's a classic sight, especially if you're looking to take a dip in the local hot springs. If you arrive later in the afternoon or evening, you can head directly to the capital city of Reykjavik. There you will be able to find several places to eat or get groceries, and also many reasonably priced places to stay the night.

*If you are staying more than a week, I strongly recommend driving the Golden Circle before continuing the ring road. Give yourself at least one to two days to do this.


Blue Lagoon

Blue Lagoon


A TO B: REYKJAVIK TO VIK

Along the road from Reykjavik to Vik, you'll find a slew of gems - waterfalls, black sand beaches, even an airplane wreckage site... just to name a few. 

When you arrive at Vik, there you'll find a quaint and cozy town with plenty to do. Vik is great for bird watching (namely for puffins - those cute orange and white looking birds) and walking the black sand beaches of Dyrholaey.

Dyrholaey.

Dyrholaey.


B TO C: VIK TO HOFN

The road from Vik to Hofn is incredibly scenic with tons to see (when is there not?!). This portion of the ring road is where you'll find Skaftafell National Park, the glacial lagoon of Jokulsarlon, and several glaciers. At these locations you have opportunity to explore ice caves, go ice climbing, or even walk along glaciers. 

Hofn is a very pretty port town that offers tasty local seafood. If you arrive before sunset I strongly recommend a visit to Stokness to explore. It's only a few miles down the road and well worth a trip.

Jokulsarlon

Jokulsarlon


C TO D: HOFN TO EGILSSTADIR OR SEYDISFJORDUR

Traveling the ring road from Hofn to eastern Iceland presents a few optional shortcuts. If you're staying true to the ring road then you will pass along many fjords. Eventually, you will come upon the largest city in east Iceland, Egilsstadir. I suggest going a bit further east to the coastal town of Seydisfjordur where you will have spectacular view of the coastline and some artsy shops to look around at.

Seydisfjordur

Seydisfjordur


D TO E: EASTERN ICELAND TO MYVATN

If you're looking to spend some time in northeast Iceland, I recommend Bakkagerdi for puffin watching. Another popular spot is Dettifoss. Dettifoss is one of the most powerful waterfalls in all of Europe. Moving westward, you'll reach Myvatn.

Myvatn lies in the northernmost part of Iceland. It is full of geothermal wonders, including the Myvatn hot baths, a more scenic and less expensive version of the Blue Lagoon. Don't forget to check out Grjótagjá caves as well. If you're looking for some hiking, I recommend Hverfjall crater.

Myvatn hot springs

Myvatn hot springs


E TO F: MYVATN TO AKUREYRI

As you move west from Mvyatn you reach Akureyri, the capital of the north. This place is just lovely. Tucked between fjords, the city center is the largest outside of Reykjavik. Whale watching is available here, as are many places to eat and find lodging. I recommend venturing out into the smaller towns on the outskirts of Akureyri, located further north, up the fjords. Make sure to see Godafoss on your way into Akureyri. Godafoss is a powerful and impressive waterfall that is well worth teh detore. 

Godafoss

Godafoss


F TO A: BACK TO REYKJAVIK

From Akureyri to Reykjavik there is the famous Kirkjufellsfoss - a must-see on your return trip home. 

Kirkjufellsfoss

Kirkjufellsfoss


THAT'S A WRAP!

Remember that these places are only a general overview in helping you form your own unique ring road experience. Quite honestly, there is too much to see and do in just a week. But if a week is all you have, well then, this may be a good start.

Looking for more information regarding Iceland? Don't forget to check out my other blog post. As always, I'd love to hear from you about what's been helpful and what I missed.

Grand Canyon - RIM TO RIM TO RIM

Looking into the Grand Canyon from Bright Angel Trail

Looking into the Grand Canyon from Bright Angel Trail

AN OVERVIEW:

The Grand Canyon may just be one of the most iconic examples of grandeur in nature. For the more daring adventurers, perhaps one of the best ways to see just how big it is would be to try hiking the Canyon from Rim to Rim to Rim. Of course this hike could be modified in any way, shape, or form. A more popular version of this is simply hiking Rim to Rim (South to North) and placing a car at both ends for pick up. Yet another option is hiking a loop of the South Rim from Bright Angel to South Kaibab, with a park shuttle able to take hikers from the end of the trail to their car.

RIM TO RIM TO RIM - THE ROUTE:

Okay, so you've decided to do the BIG hike. Here's what to expect: 50 miles over rock, dirt, steep cliffs, and winding canyons. While some hikers attempt this hike in one day, I do strongly recommend to do this over two or three days. The route can vary on which Rim and which trail you decide to begin your hike. I will suggest here a route and agenda that worked well for me.  

Day One: Camp at Mather Campground on the South Rim. Tent and car camping is $18 a site. At Mather Campground you are just a few minutes drive to Bright Angel Trailhead.

Day Two: Park car at Bright Angel trailhead and begin the epic journey. Take Bright Angel to North Kaibab. You will pass the Colorado River and then Phantom Ranch (and also many other campgrounds including Cottonwood). Camp at the North Rim. No backcountry permits are needed if camping is done on top of the Rims, but is needed if camping in the Canyon.

Day Three: Hike North Kaibab to South Kaibab. Take the park shuttle from South Kaibab trailhead to the trailhead of Bright Angel to pick up your car.

*Note: You can approximately count on 25 miles of hiking a day from Rim to Rim. It should take an average hiker of good shape and a decent pace from 10-14 hours of hiking to go Rim to Rim.

WEATHER AND WATER:

Weather is going to be a determining factor in planning your hike. Spring and fall months are gonna be your best bet when temperatures are much cooler. DO NOT ATTEMPT this hike in summer months, or if you do, use extreme caution.

There are water stations along the trail to fill up, however, there is NO WATER available along the South Kaibab trail (please plan accordingly). I carried 4 liters of water on me at all times and I was able to refill at each water station. I had no issues, but remember that everyone is different when it comes to water intake. Having a source of electrolytes is also very important. I suggest Gatorade or Propel packets to mix in water. Coconut water is also a great source of energy. 

VIEWS

Sunrise at Bright Angel Trailhead

Sunrise at Bright Angel Trailhead

The mighty Colorado River flowing through the Grand Canyon

The mighty Colorado River flowing through the Grand Canyon

Views of the North Rim from South Rim

Views of the North Rim from South Rim

WHAT TO BRING:

  • Tennis shoes or a comfortable pair of hiking boots
  • Extra pairs of socks and appropriate clothing.
  • Tent, sleeping bag, sleeping pad
  • 4 liters of water (plus water filter)
  • Meals, snacks (GU Gels)
  • Jet Boil and matches if cooking meals
  • Headlight
  • Sunscreen
  • The list continues...remember that you are hiking around 50 miles so the lighter your pack the better.

* There is food and drink sold at the Lodges at both the South and North Rim. Food and drink is also sold at Phantom Ranch, a set of cottages at the bottom of the Canyon almost directly in between South and North Rim. I would check ahead to see if these locations are open before heading into the Canyon.

CAUTION:

As usual with these kind of hikes make sure that you take the time to prepare yourself. Tell someone else about your travel plans. Pack and prepare adequately, hydrate, and bring enough nutrition to power you through. If you have any questions I'd be happy to answer them. Happy hiking!

Wooden Shoe Tulip Festival

"A tulip doesn't strive to impress anyone. It doesn't struggle to be different than a rose. It doesn't have to. It is different." - Marianne Williamson

The fields are adorned with tulips of all variety and color at the Wooden Shoe Tulip Festival.

The fields are adorned with tulips of all variety and color at the Wooden Shoe Tulip Festival.

WHAT YOU'LL SEE

Tulips. Tulips. And more tulips. Row and rows of them. All shapes and sizes. All colors and varieties. It's all here. Bring friends, bring family and come wander through the fields. Buy some popcorn and take the kids on the giant slide. Come early and catch the sun rise over the snow caps of Mt. Hood. Watch the hot air balloons take off. Buy some tulips for your loved ones. Buy some seeds to plant in your yard. Peruse the local artisan booths. Enjoy wine tasting. And takes lots of pictures! That's what you'll get at the Wooden Shoe Tulip Festival. 

HISTORY

What started as a humble 15 acres in the 1980's has now transformed into a 40 acre field of tulips. Tulips are planted each October by three machines purchased from Holland. Meticulous measures are made to make sure the tulips are free of disease, weeds, insects and erosion. Every year a new variety of tulips are planted and arranged differently for people from all over the world to enjoy.

WHERE

Woodburn, Oregon. An hour south of Portland on the I-5. 

WHEN

Generally, the Festival runs from late March to late April/early May.

HOW MUCH

Admission to get into the Festival is $5/person or $20/car (if there are more than 4 people).

MORE INFORMATION

http://www.woodenshoe.com/events/tulip-fest/tickets/

IMG_4316.JPG

Reflection Canyon

"I envied a raven as he flew into the late afternoon light over reflection canyon. I called out to him in a loud voice that echoed through the canyon, "hey buddy!" It felt good to say that. "How does it feel to be free?" But he never responded. And it was better that way."

Reflection Canyon glowing in the afternoon light

Reflection Canyon glowing in the afternoon light

WHAT TO EXPECT

Gorgeous colors and winding channels of water cut into the high cliffs of Lake Powell. Be prepared to drive a fifty-one mile dirt road followed by a rigorous, one-way 6-10 mile hike that will demand your best route-finding skills and use of a good map or GPS. Water levels and temperatures are lowest in the Spring, which is an ideal time to make this adventure.

HOW TO GET THERE

Map and compass is a great way to navigate. I picked up this map of the Escalante National Monument for $13 at REI. Well worth it!

Map and compass is a great way to navigate. I picked up this map of the Escalante National Monument for $13 at REI. Well worth it!

From Escalante go five miles east to Hole in the Rock Road. Travel exactly fifty-one miles south on a washboard dirt road. A four-wheel drive, high clearance vehicle is needed. After you've parked start hiking south, hugging the large cliffs to the west. This will help you avoid a multitude of ravines and slots canyons that wind throughout the landscape. After a few miles you will begin heading southeast over rocky hills and ankle high prickly pear cactus to reach Reflection Canyon. There is no right way although some ways are more direct. A more direct route may mean traversing up and down large hills. Do your best to avoid too much up and down travel using the landscape to your advantage.

BE PREPARED! Remember that this is a rigorous hike into the wilderness. There are rarely any trail markers (cairns) and footprints are not always a reliable source of direction. Do your research before. Bring a map and compass. Bring a GPS, or if you dont feel like spending the several hundred dollars for a decent one, map out your course on Google Maps on your phone. When Navajo Mountain is in sight (to the south) you should get cell phone coverage (I received LTE for Verizon). and be able see your progress via Google Maps. It may seem obvious but by using your natural landmarks you will be able to navigate your course. See images below.

I was able to use Google Maps to create a saved location. The heart is Reflection Canyon and the blue dot with arrow at the top left corner is where I parked my car. When I had service I could check my progress to make sure I was headed the rig…

I was able to use Google Maps to create a saved location. The heart is Reflection Canyon and the blue dot with arrow at the top left corner is where I parked my car. When I had service I could check my progress to make sure I was headed the right way. Make sure to use Google Earth for a more detailed map of the area.

Parked car at the "trailhead." Follow these cliffs to the south as you make your way to Reflection Canyon.

Parked car at the "trailhead." Follow these cliffs to the south as you make your way to Reflection Canyon.

WHAT TO PACK

Reflection Canyon can be done in one day. One long day. But for however many days you do plan to come make sure to bring one gallon of water per day. I would also recommend something like Gatorade to help replenish electrolytes. Plan meals accordingly. I am a big fan of Backpacker Pantry prepackaged meals that just need hot water. Snacks are a must as well - trail mix, protein bars, etc. Whatever you pack, make sure to use Leave No Trace principles. There are no bathrooms along the route.

WHEN YOU GET THERE

Camping is possible along Reflection Canyon although there are few spots to pitch a tent. Take great care along the cliff ledges as you will be only a few feet away from several hundred feet drop-offs. And as always, make sure to practice Leave…

Camping is possible along Reflection Canyon although there are few spots to pitch a tent. Take great care along the cliff ledges as you will be only a few feet away from several hundred feet drop-offs. And as always, make sure to practice Leave No Trace principles. Happy Camping!

After a challenging hike, reward yourself by making camp and wandering the tall cliff edges to gain the different and spectacular views of Reflection Canyon. Following the canyon edge north will take you several other stunning views.

As far as photography, I found the best success during the afternoon light before the shadows set in. The best shots were at dusk when the canyon turned to from gold to blue and back to gold. Make sure to also take advantage of the early morning light just before the sun rises over the distant cliffs. If you are lucky enough to catch a full moon you will be delightfully surprised by the glow of the canyon walls in the moonlight, especially on the white-stained places of the rock where the high water level once was.

Coyote Gulch - Jacob Hamblin Arch

The massive and very impressive Jacob Hamblin Arch in Coyote Gulch.

The massive and very impressive Jacob Hamblin Arch in Coyote Gulch.

WHAT YOU'LL SEE

Within the Grand Escalante National Monument, America's biggest monument, is the winding river of Coyote Gulch. Along the river are several notable rock formations, with the most stunning of these being the Jacob Hamblin Arch, named after the western pioneer and peacemaker. The arch boasts its impressive size and shape over the tight canyon walls of Coyote Gulch, and in the spring the river is lined with bright green foliage.

A view looking East into Coyote Gulch from the top of Jacob Hamblin Arch

A view looking East into Coyote Gulch from the top of Jacob Hamblin Arch

HOW TO GET THERE

Access to the Jacob Hamblin Arch begins in Escalante, Utah just off the scenic byway 12, which will also take you to Bryce Canyon. Five miles east of Escalante on byway 12 is Hole in the Rock Road, a sixty two mile unpaved road that ends at Lake Powell. Although I did see small two wheel drive cars on the road, four wheel drive and high clearance is highly recommended. To access the Jacob Hamblin Arch trailhead take Hole in the Rock Road thirty six miles until you reach Fortymile Ridge Road. From there head east (left) another four miles until you reach a turnoff to the left. You will reach a water tank at the top of a small hill where you can park and sign in at the trailhead.

From the trailhead, plan on hiking two miles on a fairly well marked path with cairns in sand and slick rock. The trail will lead you down a steep but navigable entrance into Coyote Gulch. This approach can be tricky with a large pack so make sure to take your time or use the small rope attached to the rock at the top of the descent to help lead you down. 

A view from the top of Jacob Hamblin Arch before you start your descent into Coyote Gulch

A view from the top of Jacob Hamblin Arch before you start your descent into Coyote Gulch

Another view from the top

Another view from the top

Cairns leading the way to the Arch

Cairns leading the way to the Arch

These white "angel wings" will denote the area of descent into Coyote Gulch

These white "angel wings" will denote the area of descent into Coyote Gulch

Views from the JH trailhead

Views from the JH trailhead


WHAT TO EAT

As for as good eats around Escalante I would highly recommend Escalante Outfitters for a half meat lovers, half vegetarian pizza with a Polygamy Porter as a beverage. Escalante Outfitters also stocks great maps and information booklets about hikes in Southern Utah.


White Pocket

A hiker in White Pocket

A hiker in White Pocket

One of the most surreal landscapes in Arizona remains largely unknown to many native explorers. Perhaps it's because of the six hour round trip over a difficult 4 wheel drive, high clearance road filled with deep sand and jutting rock that makes this surreal location very difficult to get to. While The Wave gets most of the notoriety for the area, White Pocket stands as a diamond on its own. Filled with brilliant swirls of colors and textures, White Pocket is easily navigated within a half day. Camping is also offered at the trailhead - a short quarter mile hike to White Pocket. 

Colorful swirls and textures grace the landscape at White Pocket

Colorful swirls and textures grace the landscape at White Pocket

Give yourself at least a half day to explore 

Give yourself at least a half day to explore 

To get here take the 89A to House Rock Valley Road. Road maps are provided by the BLM Ranger Station in Kanab, Utah. Stop in at Jacob Lake on your way out for a bite to eat.

Gems from Kanab

Kanab is the new gem of the Southwest. If you're looking for outdoor adventures, national parks, and wild landscapes then Kanab is your hub. Whether it's Zion, Bryce Canyon, or Lake Powell, this is the place from where you can make any adventure. Kanab sits right in the middle of several wilderness areas that are hard to get to, including the famous "WAVE."

A hiker in The Wave

A hiker in The Wave

It's at the Kanab Ranger Station where many try their luck for "The Wave." What was rather unknown in the early 90's became a huge international attraction when the Olympic Games came to Salt Lake City in 2002. The Games used The Wave in a promotional video even though it lies just south of Utah in Arizona. This brought people all over the world to Kanab to put in for a chance to see this wild beauty in the desert.

Here's how the process works: Each day twenty permits are given away. Ten are given in an online lottery entered four months in advance. The other ten are drawn in person each day at the Kanab Ranger Station. Here's what makes it hard: In the peak months it's not uncommon for at least 100 people to apply for these ten spots. Not only that, but the live lottery that's done each day is for use on the next day, which requires explorers to be flexible with their travels. As for myself, it took six attempts to finally score a permit. Persistence is key if you're want to win the golden ticket.

(Note: Winning the lottery to The Wave is just the first part of your journey. Getting to there can be tricky. Most of the year you will need at least a high clearance vehicle and most likely four wheel drive. The good news is that there is camping only 1.5 miles away from the Wire Pass trailhead where you begin your trek. This campground has bathrooms, ramadas, and fire pits for use.)

Check out the BLM's website for more information: https://www.blm.gov/az/st/en/arolrsmain/paria/coyote_buttes/permits.html  

The Wave during the winter months can often be experienced with reflecting pools of water from winter rains.

The Wave during the winter months can often be experienced with reflecting pools of water from winter rains.

But let's say you're like most people who don't win the lottery for The Wave. Don't worry. You're only in the midst of several National Parks and monuments. Places like Zion and Bryce Canyon, Cedar Breaks and Coral Pink Sand Dunes, Lake Powell and Horseshoe Bend, all stand within about an hour or two away.

Zion from Angels Landing. One of the most scenic hikes in the Southwest.

Zion from Angels Landing. One of the most scenic hikes in the Southwest.

Horseshoe Bend at sunset. Only an hours drive from Kanab. 

Horseshoe Bend at sunset. Only an hours drive from Kanab. 

Bryce Canyon from Inspiration Point. 

Bryce Canyon from Inspiration Point. 

Looking to get out of Kanab for the day? Well, if you're up for a few hours drive you can make a day trip of Valley of Fire and Capitol Reef. If you're looking for an extraterrestrial landscape, then these two spots have you covered. I recommend starting your day early and giving yourself plenty of time to enjoy the landscapes.

Valley of Fire at dusk. A must do day trip from Kanab.

Valley of Fire at dusk. A must do day trip from Kanab.

Capitol Reef National Park boasts lots of interesting rock formations and hiking trails.

Capitol Reef National Park boasts lots of interesting rock formations and hiking trails.

Want more? There's more! And that's where you'll have to see for yourself, the gems in and around Kanab - your hub to all things adventure. This is just meant to give you a little taste.

Contact me if you have any questions on places to visit, places to eat, or places to stay in Kanab. I would recommend visiting Jeff and JoAnn at the Cowboy Bunkhouse in Kanab for a hot shower and breakfast at only $30 a night (http://www.thecowboybunkhouse.com/). For food, grab yourself a homemade apple pie at the Thunderbird Cafe at Mt. Caramel Junction just before, or after, going to Zion National Park (http://www.zionnational-park.com/bw3.htm).